Showing posts with label Business email hosting. Show all posts

Friday, June 12, 2015

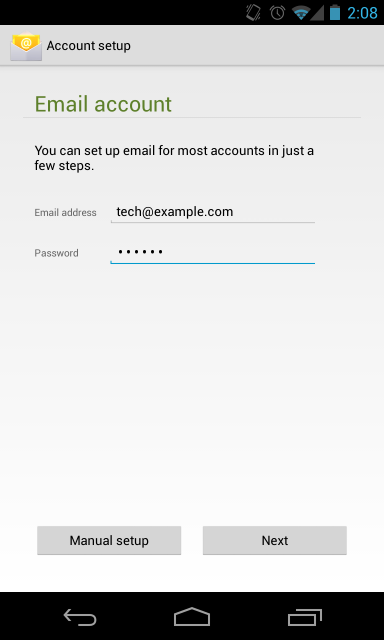
How to setup email on Android

How to setup email on Android


1. Open your email client.
2. Enter your full email address and password.


3. For the Account type, select POP3.


4. For the Incoming settings, we recommend using your access domain for the incoming server. You will also want to leave the Security Type as None. See Figure 3 as an example.


5. For the Outgoing settings, we also recommend using your access domain for the SMTP server.


6. Configure your Account options as desired on the subsequent screens and you're done!

How to setup email on iPhone

How to setup email on iPhone


1. In your iPhone, go to Settings-> Mail, Contacts, Calendars and go to Add Account. From the selection shown, choose "Other".


2. Enter the required information as you see on your screen and confirm by pressing "Save".


3. Click on "POP". If you have correctly entered your information in the previous screen, all the fields here should already be filled in for you.
Fill in the required fields as you see on the picture below but with your account information. Then click on "Save" to confirm.


4. After a few seconds, if the following screen will pop up. Click on "Yes".


Enjoy using Webmail in your iPhone!

Tuesday, November 5, 2013

Reliable & Secured Business Email Hosting

Reliable & Secured Business Email Hosting

Business EMail Hosting

Reliable & Secured business email hosting available at Operion
We have a promotion for galaxy plan at only RM350 for 2 years

For more information,
Please visit our website:

Online Order Special!! 
with FREE GIFT!!

1 Page Website + RM200 Cash Voucher 
for all the online order
*** Additional 5% discount for all online credit card purchase. ***

Thursday, October 31, 2013

Unlimited & Reliable & Secured business email hosting at RM350 for 2 years! PLUS 5% discount for all credit card purchase.

Unlimited & Reliable & Secured business email hosting at RM350 for 2 years! PLUS 5% discount for all credit card purchase.


Unlimited & Reliable & Secured business email hosting at RM350 for 2 years! PLUS 5% discount for all credit card purchase.

For more information, Please visit our website:
http://www.operion.com.my/email_hosting.html


Sunday, March 24, 2013

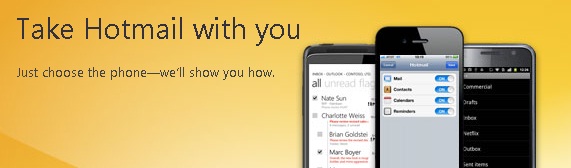
Go mobile with Live Mail/Hotmail

Go mobile with Live Mail/Hotmail


If your phone's with you, so is your email. With Hotmail on your mobile phone, you can take your email, contacts, calendar, and photos with you wherever you go. Set up Hotmail on your Windows Phone, iPhone, Android, or other mobile phone.

Which phone do you have?

Get the Live Mail/Hotmail app on your Android

Get the Live Mail/Hotmail app on your Android

Get the Live Mail/Hotmail app on your Android

The Hotmail app for Android is free. To get it, search for Hotmail in Google Play from your phone (choose the app by Microsoft+SEVEN).*
  • Get your email the instant it comes in.
  • All of your folders and subfolders are browsable.
  • Have more than one Hotmail account? Get them all in the one app.
  • Send photos via email from your phone to your friends.
  • Send, receive, and view attachments on your phone.
  • Calendar and contacts are synced to your phone.
Picture of the Hotmail folder list on an Android phone. With the Hotmail app on your Android phone, all your folders and subfolders are browsable.

Get Hotmail without the app

You can also get Hotmail on your Android phone without the app. Get the detailed steps
If these steps don’t work, you can always access Hotmail through your phone’s browser at www.hotmail.com.
*App may not be available in all countries or regions.
Get Live Mail/Hotmail on your Nokia Symbian phone

Get Live Mail/Hotmail on your Nokia Symbian phone

Get Live Mail/Hotmail on your Nokia Symbian phone

The steps to get Hotmail on your phone will vary depending on which Nokia phone you have.

If you have a Nokia C6-00, Nokia C6-01, Nokia C7-00, Nokia E7-00, or Nokia N8-00, follow these steps:

  1. Select E-mail set up on your home screen.
  2. Select Start e-mail set up.
  3. Select Yes if Allow application to use network to send and receive data? appears.
  4. Follow the instructions on the screen.
  5. A list of email service providers appears. Select the one you want to use, or, if it isn’t there, select Other.
  6. Enter your full Hotmail address and password. The phone will automatically load your email settings.
    Once you’ve set up your email, you don’t have to re-enter your email address and password when you want to use it. All you have to do is select your account.

If you have a Nokia S40, follow these steps:

  1. Select Mail on your home screen.
  2. Select Get the latest services.
  3. Select Your internet connection.
  4. Read the service terms and privacy policy and select I agree.
  5. A list of email service providers appears on your home screen. Select the one you want to use, or, if it isn’t there, select Other.
  6. Enter your full Hotmail address and password and select Sign in. The phone will automatically load your email settings.
If the steps above don't work for your Nokia phone, you can access Hotmail through your phone’s browser at www.hotmail.com.

Wednesday, February 27, 2013

Get Live Mail/Hotmail on your Windows Phone

Get Live Mail/Hotmail on your Windows Phone

Get Live Mail/Hotmail on your Windows Phone

Setting up Hotmail on your Windows Phone is easy and free.* When you sync Hotmail to your phone, you can:
  • Manage your inbox, including reading, deleting, composing, and replying to email messages.
  • Access your Hotmail folders, contacts, and calendar.
  • Send photos and videos.
  • Get notified when you have new messages.
When you first set up your Windows Phone, you're asked to sign in with your Windows Live ID (that’s the same as your Hotmail address). If you didn't sign in then―or if you have more than one Windows Live ID—follow these steps:
  1. On Start, flick left to the App list, tap Settings, and then tap Email & accounts.
  2. Tap Add an account, and then tap Windows Live.
  3. If you didn’t sign in with a Windows Live ID during setup, the Before you sign in screen appears. On this screen, tap Next.
  4. Tap the Windows Live ID box, and then type your Windows Live ID.
  5. Tap the Password box, and then type your Windows Live password.
  6. Tap Sign in.